Laminate switchable smart glass is a modern and innovative solution that allows glass to switch from clear to frosted at the touch of a button. This technology is increasingly used in homes, offices, hotels, hospitals, and commercial spaces to provide privacy, control light, and create a sleek, modern look. One of the most common questions people have about this technology is about installation—how easy it is to install laminate switchable smart glass and what steps are involved. In this blog, we will explain the installation process, factors to consider, and tips for a smooth setup in simple, easy-to-read language.
Understanding Laminate Switchable Smart Glass

What Is Laminate Switchable Smart Glass?
Laminate switchable smart glass is made of two or more layers of glass with a special switchable layer sandwiched between them. This layer contains liquid crystals or suspended particles that respond to electricity:
-
Clear Mode: When powered, the particles align, allowing light to pass through and making the glass transparent.
-
Frosted Mode: When the power is off, the particles scatter, making the glass opaque for privacy.
The laminated design also adds safety and durability, as it holds the glass together in case of breakage.
How Laminate Switchable Smart Glass Works
The key feature of this glass is its switchable layer. Electricity aligns the particles in the layer, making the glass clear. When the electricity is switched off, the particles scatter randomly, turning the glass frosted. This technology is built into the laminate, so the glass can be used for windows, doors, partitions, and other applications without needing extra attachments.
Installation Process of Laminate Switchable Smart Glass
Step 1: Planning and Measuring
Before installation, it is important to plan the project carefully. Measure the glass area accurately to ensure a perfect fit. Decide where the glass will be installed and plan for power supply access, as electricity is needed for the smart function.
Step 2: Choosing the Right Glass Type
Laminate switchable smart glass comes in different options: clear, tinted, or UV-protective. Choose the type based on your privacy needs, sunlight control, and aesthetic preferences.
Step 3: Preparing the Area
Prepare the installation area by cleaning the surrounding surfaces. Ensure that the frame or structure supporting the glass is strong and stable. If installing in existing windows or doors, remove the old glass carefully.
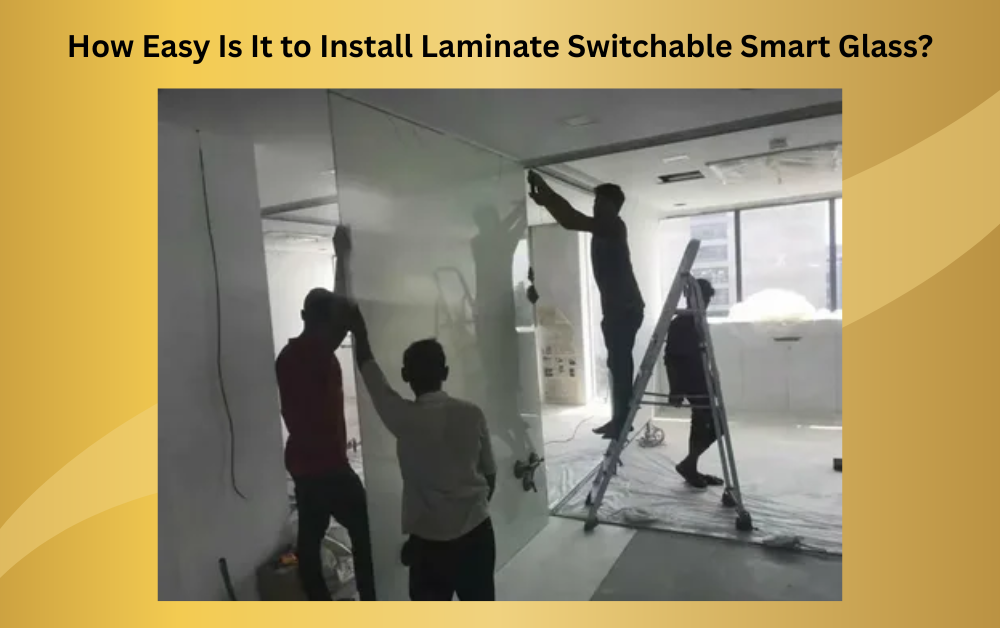
Step 4: Installing the Glass
The glass is placed into the frame like normal laminated glass. Unlike retrofit films, this is a direct glass installation, which ensures that the smart layer is fully protected and functional.
Step 5: Connecting the Electrical System
After placing the glass, connect it to the power supply. Most laminate switchable smart glass panels use low-voltage electricity. This can be controlled through wall switches, remotes, or smart home systems. Make sure all connections are secure and tested before finishing the installation.
Step 6: Final Testing
Once installed and powered, test the glass by switching between clear and frosted modes. Check for smooth operation and even distribution of the frosted effect. If any part of the glass does not switch properly, check electrical connections or contact the manufacturer.
Factors That Affect Installation Ease
Glass Size
Smaller glass panels are easier to install, while very large panels may require additional help or professional installation.
Frame Type
Standard frames make installation straightforward, but custom frames may require precise adjustments.
Power Supply Access
Having easy access to electricity simplifies installation. If wiring is difficult, it may require extra planning or professional help.
Professional Help
While small projects can sometimes be DIY, it is recommended to hire professionals for larger or complex installations. They ensure proper alignment, electrical safety, and smooth operation.
Tips for a Smooth Installation
-
Measure twice, install once: Accurate measurements prevent mistakes.
-
Clean the frame and area: Dust or dirt can affect the glass fit.
-
Use proper tools: Glass suction cups, gloves, and secure frames make handling safer.
-
Check electricity beforehand: Ensure proper voltage and wiring before connecting the glass.
-
Hire professionals for large installations: Safety and performance are guaranteed.
Benefits of Easy Installation
Time-Saving
Laminate switchable smart glass can often be installed in a few hours, especially in standard-sized windows or partitions.
Cost-Effective
Compared to replacing entire window units, this glass reduces labor costs when installed correctly.
Immediate Use
Once installed, the glass works immediately. There is no need for additional treatments or films.
Aesthetic and Functional Upgrade
Easy installation means you can quickly enjoy benefits like privacy, light control, energy efficiency, and a modern appearance.
Common Applications
Homes
-
Bathrooms and bedrooms for privacy
-
Living rooms with partitions
-
Balconies and patios
Offices
-
Conference rooms
-
Glass partitions between workspaces
-
Reception areas
Hotels and Commercial Spaces
-
Guest room partitions
-
Lobby areas
-
Spa and wellness centers
Hospitals and Clinics
-
Patient privacy screens
-
Consultation rooms
-
Waiting areas
Final Thoughts
Laminate switchable smart glass is a modern and functional solution that enhances privacy, controls light, and adds a sleek look to any space. The installation is generally straightforward, especially with proper planning, accurate measurements, and the right tools. While small projects can sometimes be handled DIY, professional installation ensures safety, proper electrical connections, and long-lasting performance.
With the ease of installation, this smart glass is a practical investment for homes, offices, hotels, and commercial spaces. Once installed, it provides instant privacy, modern aesthetics, and energy efficiency, making it a valuable upgrade for any property.
For more insightful articles related to this topic, feel free to visit: highdadirectory.com
Prasanna