

If you’ve been looking around your home and thinking it could use a touch of character, trim and molding might be exactly what it needs. These details frame your rooms, highlight your windows and doors, and can turn plain walls into polished spaces. Whether you’re tackling crown molding in the living room or adding baseboards in a hallway, understanding the process before you start makes a big difference. Just like you’d plan ahead for a project such as small plumbing repairs services USA, knowing what tools, materials, and techniques to use can save you time and frustration.
Why Trim and Molding Matter
Trim and molding are more than decorative accents. They serve both visual and practical purposes. Trim covers gaps where walls meet floors or ceilings, hides imperfections, and defines a room’s design. A simple baseboard can make a wall look taller, while crown molding draws the eye upward and adds height to a space.
Molding also provides a way to connect styles throughout a home. Traditional homes may feature ornate designs, while modern spaces lean toward clean, simple lines. The type of trim you choose helps tell your home’s design story.
Planning Your Trim and Molding Project
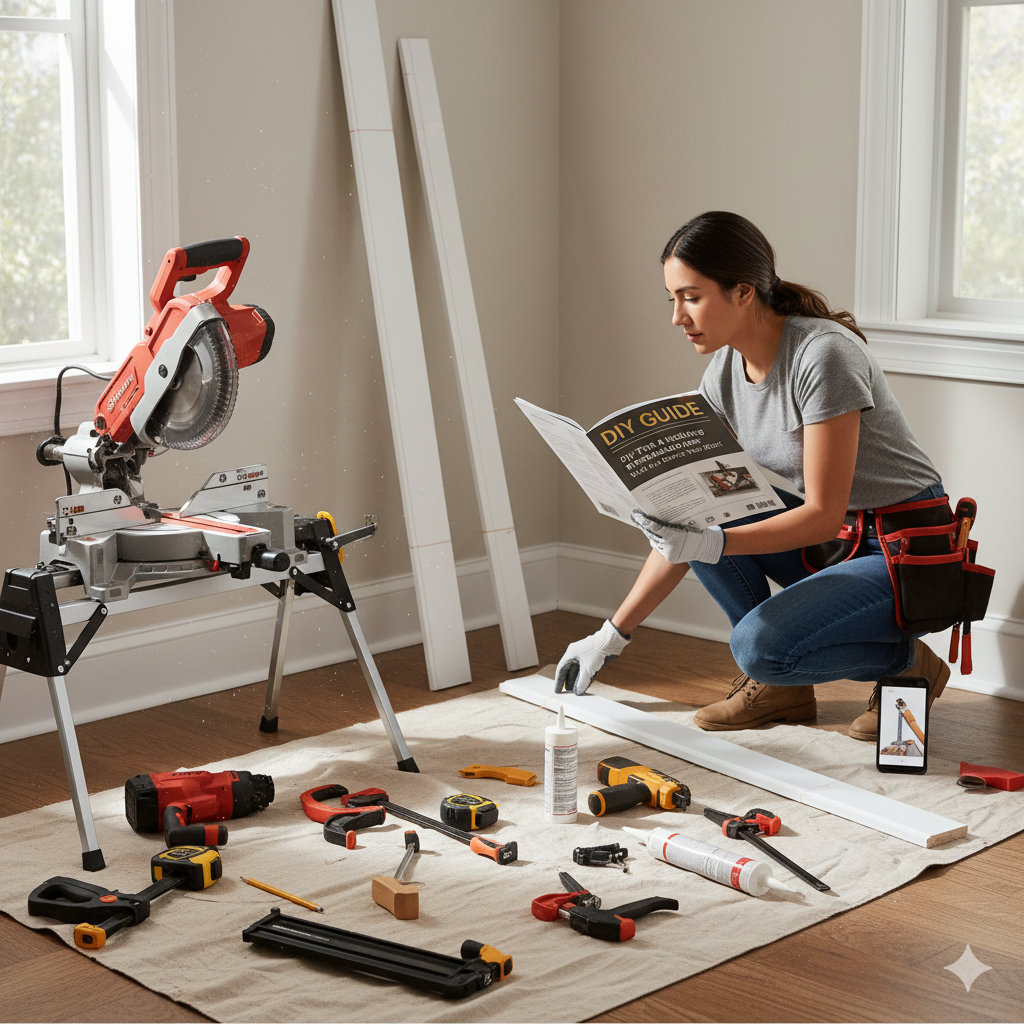
Before you buy materials or start cutting, take a moment to plan your project. This step saves time and money later on.
- Measure Twice, Cut Once
Begin with accurate measurements. Measure each wall or area where trim will be installed, and always add a few extra feet for waste or mistakes. Corners and angles require precision, and a little extra material helps you avoid unnecessary trips back to the store. - Choose the Right Material
Trim and molding come in several materials, each with its benefits:
- MDF (Medium-Density Fiberboard): Budget-friendly, smooth, and easy to paint. Great for interiors.
- Wood: Offers a natural finish and can be stained. Ideal for traditional designs.
- PVC or Polyurethane: Resistant to moisture, perfect for bathrooms or basements.
Pick materials based on where they’ll be installed and the look you want.
- Gather Tools Before You Begin
Having the right tools on hand keeps your workflow smooth. You’ll need:
- A miter saw for accurate angled cuts
- Measuring tape and level
- Nail gun or hammer and finishing nails
- Caulk and wood filler
- Paint or stain, depending on the finish
Make sure your saw blade is sharp for clean cuts, especially if you’re working with detailed molding profiles.
Preparing the Space
Before you start attaching trim, clear the area. Move furniture, take down curtains, and remove old trim if needed. Use a pry bar gently to avoid damaging the walls. Once removed, inspect the surface. Patch holes and sand uneven areas so your new trim sits flush.
If you’re painting the walls, do it before adding the trim. This avoids messy edges later. You can always touch up after installation.
Cutting and Fitting Trim
This is where your attention to detail pays off. Start with the longest walls first, as they’re often the easiest.
- Mark and Cut Carefully
Measure each piece and use a pencil to mark your cut lines. When cutting angles, especially for corners, use your miter saw set to 45 degrees. Inside corners may require coping—where one piece is cut to fit the contour of the other—for a tighter fit. - Dry Fit Before Nailing
Always test-fit your pieces before permanently attaching them. This lets you adjust angles or lengths before making holes in the wall. - Attach Securely
Use a nail gun for faster installation, or a hammer if you prefer a more hands-on approach. Drive nails into the studs whenever possible for stability. Fill the nail holes with wood filler once finished.
Caulking, Painting, and Finishing Touches
Once all the trim is up, inspect your work. Small gaps are normal, especially in older homes where walls aren’t perfectly straight. Use paintable caulk to fill these spaces and create a clean edge. Wipe excess caulk with a damp cloth for a smooth finish.
If your trim is wood, sand lightly before applying stain or polyurethane. For painted trim, use a semi-gloss or satin finish—it’s durable and easier to clean. Two coats usually give the best result.
Common Mistakes to Avoid
Even experienced DIYers make small errors that affect the final look. Here are a few to watch for:
- Skipping caulk or filler: Gaps can make your trim look uneven.
- Rushing cuts: Poor angles can throw off your corners.
- Not priming MDF: Without primer, paint can soak unevenly and look patchy.
- Ignoring wall imperfections: Trim won’t sit flat if the wall isn’t prepped.
Taking time at each step gives you a professional-looking finish without frustration later.
Cost and Time Considerations
Trim and molding installation costs vary based on material and room size. MDF and PVC options are generally more affordable than solid wood. If you’re doing the work yourself, the biggest investment will be your time. A single room can take a day or two to complete, depending on your pace and skill level.
Hiring a professional can save time, especially for complex designs or large projects. But for homeowners who enjoy hands-on work, installing trim yourself can be both rewarding and cost-effective.
When to Call for Help
Some projects are perfect for DIY, while others benefit from a professional touch. If your trim includes intricate crown molding, vaulted ceilings, or built-in cabinetry, hiring a handyman can make sense. A skilled professional can handle complex cuts and ensure the trim fits seamlessly. For reliable home improvement and maintenance, you can always reach out to Magic Touch Handy Man for expert assistance.
Frequently Asked Questions
- What type of trim is best for bathrooms?
PVC or polyurethane trim is ideal for bathrooms. It resists moisture and won’t warp or rot over time. - Should I paint or stain trim before or after installing it?
It’s often easier to apply one coat before installation, then do touch-ups after caulking and filling nail holes. - How do I get clean corners on crown molding?
Use a miter saw and make test cuts on scrap pieces until you get the angle right. Coping inside corners can also help achieve a tighter fit. - Can I install trim over textured walls?
Yes, but you may need to fill deeper textures near the edges to help the trim sit flat and adhere properly. - How do I know if my walls are straight enough for trim?
Run a long level or straight edge along the wall. If you see gaps, use caulk or shims to adjust before nailing.
Sam Arther