
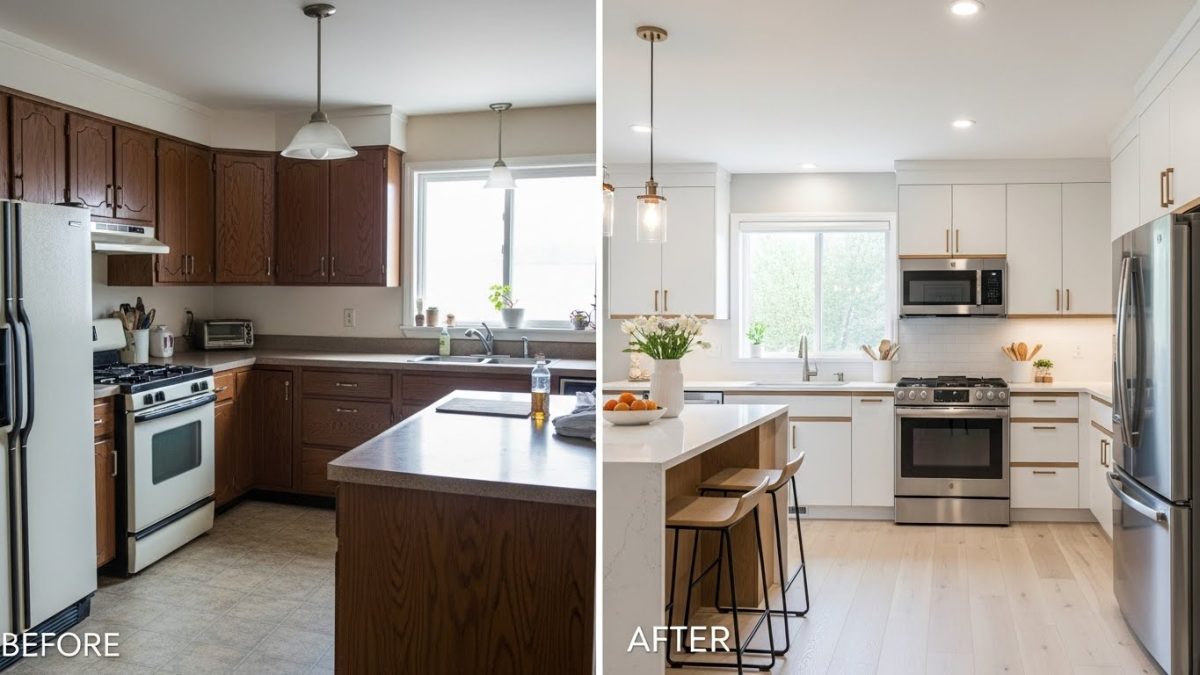
Kitchen cabinet wrapping is a modern, cost-effective solution for giving your kitchen a fresh, stylish look without the expense and hassle of a full remodel. Whether you’re aiming for a sleek contemporary finish, a classic woodgrain aesthetic, or a pop of vibrant color, wrapping cabinets can transform your space quickly and efficiently.
What is Kitchen Cabinet Wrapping?
Kitchen cabinet wrapping, also known as cabinet vinyl wrapping or cabinet refacing, involves covering existing cabinet surfaces with adhesive vinyl films. Unlike painting, which requires sanding and multiple coats, or full cabinet replacement, which is expensive and labor-intensive, wrapping is a practical middle ground.
Vinyl wraps come in a variety of textures and finishes, including matte, glossy, and woodgrain. Adhesive films are designed to stick to smooth, clean surfaces, making them ideal for modern cabinetry made from MDF, plywood, or laminate. This process not only changes the appearance of your cabinets but can also protect surfaces from scratches, moisture, and daily wear.
Benefits of Wrapping Kitchen Cabinets
Kitchen cabinet wrapping offers numerous advantages over traditional remodeling methods:
-
Cost-effectiveness: Wrapping is generally more affordable than replacing cabinets entirely, saving homeowners thousands of dollars.
-
Quick transformation: Most cabinets can be wrapped within a few days, compared to weeks for full remodels or repainting projects.
-
Durability and easy maintenance: High-quality vinyl wraps are resistant to heat, moisture, and stains. Cleaning usually requires only mild soap and water.
-
Variety of styles and finishes: Homeowners can choose from glossy, matte, woodgrain, metallic, or textured finishes to match their kitchen’s design.
-
Environmental benefits: Cabinet wrapping generates less waste than a full replacement, making it a greener option for eco-conscious remodelers.
Step-by-Step Guide to Wrapping Your Kitchen Cabinets
Preparation and Surface Cleaning
Proper preparation is essential for a successful cabinet wrapping project. Start by removing all cabinet doors, drawers, and hardware. Clean every surface meticulously to remove grease, dust, and residue. This step ensures the adhesive film sticks evenly and prevents bubbles or peeling later.
Check for any surface damage such as scratches or dents and repair them before wrapping. Smooth surfaces provide the best results, especially for glossy or textured vinyl finishes.
Cutting and Applying Vinyl Wraps
Measure each cabinet door and drawer carefully, allowing extra material for trimming. Cut the vinyl wrap slightly larger than the surface to ensure complete coverage.
Apply the vinyl starting from one edge and use a squeegee to smooth out the material gradually. A heat gun can help the vinyl conform to curves, edges, and corners. Take your time, as rushing the application often results in bubbles or wrinkles.
For a polished look, trim any excess vinyl along edges and ensure the adhesive bonds fully to the surface. Professional installers often use specialized tools to achieve seamless results, but DIY enthusiasts can achieve similar outcomes with patience and precision.
Finishing Touches
Once all surfaces are wrapped, reattach the cabinet hardware carefully. For extra durability, consider sealing edges with a clear adhesive or edge tape. Regular maintenance, including gentle cleaning and avoiding harsh chemicals, can extend the life of your wraps for up to 10 years.
DIY vs Professional Cabinet Wrapping
Deciding between a DIY project and hiring a professional depends on your experience, tools, and the desired finish:
-
DIY Pros: Lower cost, personal satisfaction, and flexibility in timeline.
-
DIY Cons: Requires precision, time, and patience; mistakes can be costly.
-
Professional Pros: Flawless finish, time-saving, and warranty or guarantee.
-
Professional Cons: Higher upfront cost but often worth it for long-term durability.
Cost-wise, DIY materials typically range from $5–$15 per square foot, while professional services can cost $15–$40 per square foot depending on the project’s complexity.
Common Mistakes to Avoid
Avoid these common pitfalls to ensure a smooth, professional-looking finish:
-
Not cleaning surfaces properly before application
-
Cutting vinyl too small or too large
-
Ignoring corners and edges, leading to peeling
-
Rushing the application process, causing bubbles or wrinkles
Careful preparation and patience are key to a successful cabinet wrap.
Cost and ROI of Kitchen Cabinet Wrapping
On average, kitchen cabinet wrapping costs between $2,000 and $5,000 for a standard kitchen. Compared to a full remodel, which can exceed $15,000, wrapping offers significant savings.
Investing in cabinet wrapping can also improve your home’s appeal and resale value. Buyers appreciate modern kitchens, and a well-executed wrap can provide a fresh look without a full renovation.
Trends and Popular Styles in Kitchen Cabinet Wrapping
Current trends in 2025 reflect a preference for clean, modern aesthetics:
-
Matte finishes: Soft, understated, and resistant to fingerprints
-
Glossy finishes: Sleek, reflective surfaces for contemporary kitchens
-
Woodgrain textures: Provide warmth and a natural look
-
Bold colors and patterns: Navy, emerald green, or geometric designs
Choosing a style that complements your countertops, backsplash, and flooring ensures a cohesive and stylish kitchen transformation.
Case Study: Real-Life Kitchen Cabinet Makeover
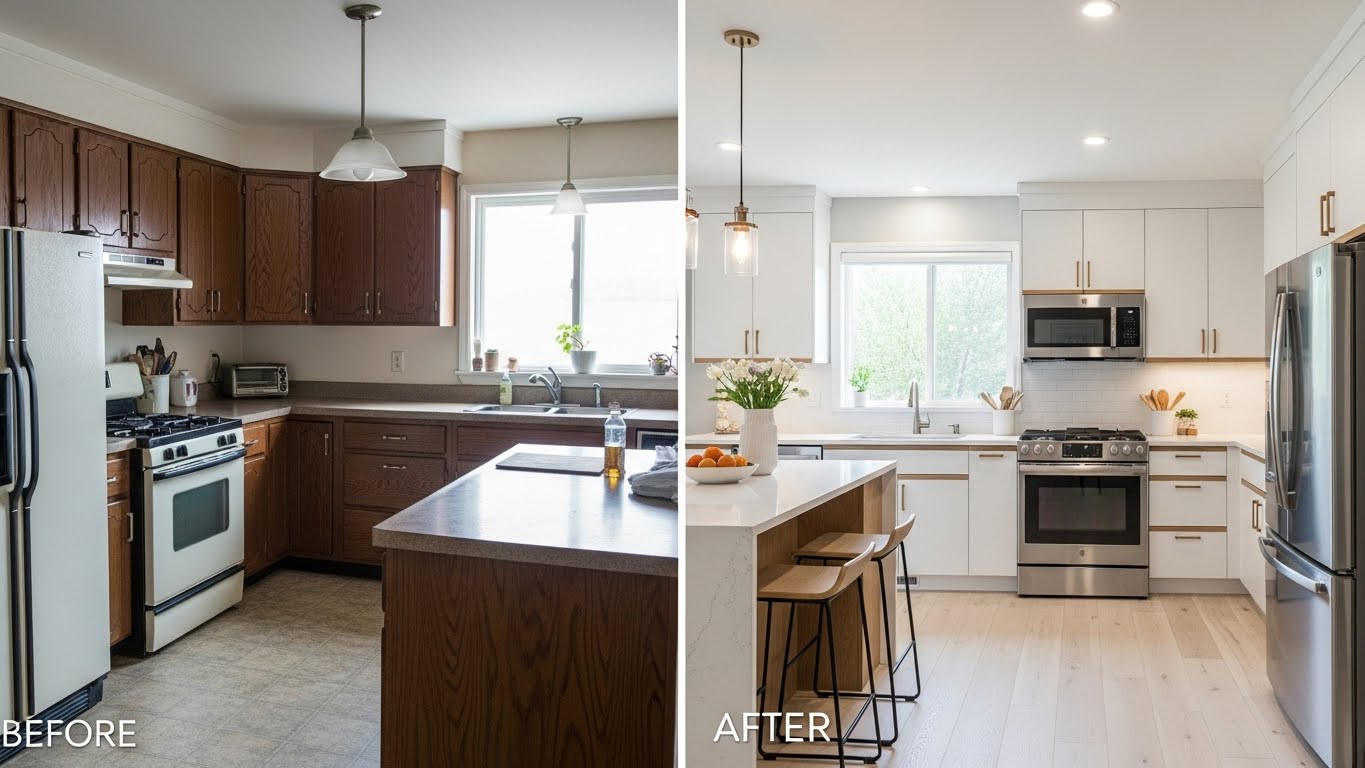
A small urban kitchen recently underwent a cabinet wrap makeover. The homeowner chose a matte white vinyl with natural woodgrain accents. The project took just three days and cost under $3,000, a fraction of the cost of a full remodel. After completion, the kitchen appeared brighter, more spacious, and modern, demonstrating how impactful cabinet wrapping can be.
FAQs
1. Can I wrap cabinets over existing paint or laminate?
Yes, but surfaces must be clean, smooth, and free of damage for the vinyl to adhere properly.
2. How long does a cabinet wrap last?
High-quality vinyl wraps can last 7–10 years with proper care.
3. Is cabinet wrapping a DIY-friendly project?
Yes, but it requires patience, precise measurements, and the right tools for the best results.
4. How much does professional cabinet wrapping cost?
Professional services typically range from $15–$40 per square foot, depending on kitchen size and complexity.
5. Can I change the color of my cabinets without removing them?
Yes, wrapping allows you to completely change cabinet colors without removing or painting them.
6. Are vinyl wraps heat-resistant?
Most high-quality wraps can withstand normal kitchen heat, but avoid direct contact with ovens or stovetops.
7. How do I clean wrapped cabinets?
Use a soft cloth with mild soap and water; avoid abrasive cleaners to prevent damage.
Oscar_Hammond